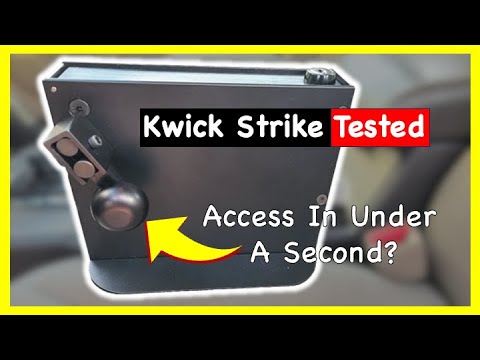
Disassembly & Reassembly
BERETTA CHEETAH // Field strip the Beretta 84fs Cheetah or Beretta 85fs Cheetah and Beretta 81
Are you trying to figure out how to field strip the Beretta 84 or Beretta 85 so you can clean it and…
Start Here
Start with the core bench skills every DIY gunsmith needs: safe handling, basic firearm inspection, cleaning, lubrication, simple troubleshooting, tool control, and knowing when to stop before a small job turns into a parts-ordering adventure.
DIY Gunsmithing Basics
DIY gunsmithing sounds more complicated than it really is. That does not mean it is easy. It means most people start in the wrong place. They start with parts, upgrades, and internet guesses instead of safety, inspection, tools, and judgment.
Start Here
The basics of DIY gunsmithing are not glamorous, but they are what keep you from damaging parts, wasting money, or turning a simple maintenance job into an expensive lesson.
DIY gunsmithing is the process of maintaining, inspecting, troubleshooting, cleaning, and performing basic firearm-related bench work on your own firearms.
That can include cleaning and lubrication, field stripping, basic disassembly and reassembly, replacing simple wear parts, diagnosing common malfunctions, inspecting magazines, checking springs, and performing basic function checks after maintenance.
That does not mean every job belongs on your kitchen table. Some work should go to a qualified gunsmith, especially jobs involving headspace, chamber work, pressure-bearing parts, sear engagement, trigger geometry, timing, barrel fitting, or anything you do not fully understand.
There is a big difference between self-reliance and pretending. Self-reliance means learning enough to make better decisions. Pretending means grabbing a file and hoping confidence fills the knowledge gap. It will not.
Routine care like cleaning, lubrication, inspection, tightening screws to proper torque, and replacing basic wear parts with correct factory-spec parts.
Finding the real cause of a problem before replacing parts. This means observing symptoms, testing simple causes, and changing one thing at a time.
Fixing something that is broken, worn, loose, damaged, or not working correctly. Repair requires diagnosis first, not parts roulette.
Changing the firearm from its original configuration. This requires more care because changes can affect reliability, safety, and function.
Before you clean, inspect, disassemble, adjust, troubleshoot, or even think about doing bench work, the firearm needs to be made safe.
Not beside the mat. Not “over there somewhere.” Away from the work area.
Most mistakes happen when people assume instead of verify. The gun was probably unloaded. The chamber was probably empty. The magazine was probably out. That word probably has caused a lot of holes in things that were not supposed to have holes.
Make safety a ritual. Same steps. Every time. No drama. No shortcuts.
A lot of DIY problems happen because someone starts taking parts off before they understand what they are trying to accomplish.
Before you touch a tool, ask yourself:
That last one matters. There is nothing wrong with learning. There is something wrong with tearing into a firearm at 10:30 at night when you need it working tomorrow and your only plan is “YouTube will save me.”
YouTube might help. It might also show you six different versions of the same firearm, one of which matches yours, three of which almost match, and two that were uploaded by someone filming with a potato during an earthquake.
If you want to troubleshoot firearms, you need to understand the basic cycle of operation. For many semi-automatic firearms, that cycle includes:
You do not need to be an engineer to understand the basics. You just need to know what should happen, in what order, and what parts are involved.
That matters because malfunctions are clues. A failure to feed is not the same as a failure to extract. A light primer strike is not the same as a failure to reset. A stovepipe is not the same as a double feed.
If you do not know the difference, you will probably guess wrong. Guessing wrong leads to buying parts you did not need, polishing things that should not be polished, or blaming the gun when the problem was a magazine all along.
The firearm fails to move a round from the magazine into the chamber. Start with the magazine, ammo, feed path, lubrication, and recoil spring condition.
The trigger is pressed, but the round does not fire. Possible causes include ammo, primer issues, firing pin or striker problems, spring issues, or improper assembly.
The fired case does not come out of the chamber properly. Start with the chamber, extractor, ammo, fouling, and visible wear.
The case comes out but does not clear the firearm. Possible causes include ammo energy, grip, ejector condition, extractor tension, cycling speed, or fouling.
One of the best beginner habits is simple: clean and inspect before you replace parts.
Dirty guns cause problems. Dry guns cause problems. Over-lubed guns can cause problems too. Old lubricant can thicken. Carbon can build up. Springs can weaken. Screws can loosen. Magazines can get dirty. Extractors can collect crud. Feed ramps can get fouled. Tiny bits of brass, unburned powder, lint, and range debris can hide in places you forgot existed.
Before assuming something is broken, ask:
Cleaning is not magic. It will not fix everything. But it gives you a baseline.
Trying to troubleshoot a filthy firearm is like trying to diagnose a truck engine while raccoons are actively living in the airbox. Maybe the fuel pump is bad. Maybe the raccoons are the issue. Start with the obvious.
Beginners often ignore magazines. That is a mistake.
A magazine is not just a box that holds ammunition. It controls feeding angle, spring pressure, cartridge presentation, and timing. A weak spring, damaged feed lips, sticky follower, bent body, or dirty magazine can make a reliable firearm look broken.
If you are having feeding problems, do not start by blaming the gun. Start by asking:
For troubleshooting, mark your magazines. Use paint marker, tape, or numbered baseplates. If the same magazine keeps showing up at the scene of the crime, you found your suspect.
Ammunition can change how a firearm behaves. Different bullet shapes, overall lengths, pressures, case materials, recoil impulse, and quality control can all affect reliability.
If a firearm only malfunctions with one specific ammo type, that matters.
This shows up a lot with semi-autos. A firearm needs enough energy to cycle properly. If the ammo is weak, dirty, inconsistent, or shaped in a way the gun does not like, the firearm may not run correctly.
That does not always mean the gun is broken. It may mean the gun is telling you it does not enjoy that particular flavor of bargain bucket nonsense.
You do not need every gunsmithing tool ever made. You do need the right basic tools.
The wrong tool damages parts. A hardware-store screwdriver can chew up gun screws. A cheap punch can bend, mushroom, or slip. A bad vise setup can crush or mar parts. The wrong hammer can make a delicate job look like it was handled by a caffeinated caveman.
A beginner bench should focus on control, fit, and protection.
Your phone is one of the best beginner gunsmithing tools on the bench.
Before removing parts, take pictures of spring orientation, pin direction, screw locations, part stacking order, trigger group layout, small parts before removal, and anything that looks confusing.
Do not trust memory. Memory is a liar wearing work gloves.
When parts start rolling around and the dog decides that one spring looks delicious, those photos may save you a lot of pain. You can also use small trays, labeled cups, magnetic bowls, or a mat with sections to keep parts organized.
The basic rule is simple: take it apart in a way that helps you put it back together.
Do not do detailed bench work in chaos. You want good lighting, a clean surface, no live ammo on the bench, room to lay parts out, a way to contain springs and pins, no distractions, and correct reference material nearby.
Small parts have a gift. They wait until you are slightly tired, then launch themselves into another dimension.
If you are working with springs, detents, pins, plungers, or tiny parts under tension, control the area. Work inside a clear bag when appropriate. Use a bench block. Use your thumb to capture parts. Wear eye protection.
You are not paranoid. You are experienced in advance.
This is one of the biggest beginner rules. If a part does not move, stop. Do not immediately hit it harder. Ask why.
It may be a hidden pin, a directional pin, a set screw, thread locker, spring tension, the wrong disassembly order, carbon buildup, a part that is not supposed to move, or a manufacturer variation.
Force can be useful when used correctly. Force used blindly is how parts get bent, scratched, snapped, launched, or turned into “learning opportunities.”
When something feels wrong, stop and verify. The bench does not reward ego.
After cleaning, reassembly, part replacement, or maintenance, you need to verify the firearm works correctly before trusting it.
A function check is not the same as live fire. A basic function check helps confirm that controls, safeties, reset, lockup, magazine fit, slide or bolt movement, and other basic operations are working as expected.
The exact function check depends on the firearm. Do not use a generic function check and assume it applies to everything. A Glock, 1911, AR-15, pump shotgun, bolt-action rifle, and DA/SA pistol do not all verify the same way.
Use the manufacturer’s manual or a trusted source for that specific firearm.
At a minimum, after reassembly, you want to confirm:
That last one is not a joke. If there is a part left over, the gun is not “extra efficient” now. Something is wrong.
DIY gunsmithing gets much easier when you stop thinking in terms of “the gun is broken” and start thinking in terms of symptoms.
Common symptoms include failure to feed, failure to chamber, failure to fire, light primer strikes, failure to extract, failure to eject, stovepipes, double feeds, failure to lock back, failure to reset, magazine seating problems, accuracy shifts, loose optics, unusual wear, and unusual sounds or feel.
Each symptom points you toward a different set of likely causes.
The goal is not to memorize every possible failure. The goal is to build a habit:
Troubleshooting Habit
That beats guessing. It also beats ordering parts because a stranger online sounded confident.
When troubleshooting, do not change five things at once.
If you clean the gun, replace the recoil spring, change magazines, change ammo, polish parts, install an upgrade, and adjust something all in the same session, you may fix the problem but you will not know what actually fixed it.
Worse, you may create a new problem and have no idea where it came from.
A better troubleshooting path looks like this:
That is how you learn. That is also how you avoid becoming the guy who says, “I changed everything and now it does this weird thing.” Nobody wants to be that guy.
The manufacturer’s manual matters. Use it.
It may not be exciting. It may read like it was written by a committee trapped in a filing cabinet. But it usually contains important information about field stripping, lubrication points, safety warnings, recommended ammo, parts diagrams, function checks, maintenance intervals, torque specs, and reassembly notes.
For older firearms, surplus guns, discontinued models, or firearms with multiple generations, make sure the information matches your exact model.
Small differences matter. One pin, spring, detent, or design change can make a video or article almost right. Almost right is where trouble lives.
A simple notebook or digital note can save you time.
Track the date cleaned, round count if known, ammo used, magazines used, malfunctions observed, parts replaced, torque values, optic zero changes, lubricants used, and problems to watch.
This is especially helpful for troubleshooting. If a pistol starts having failures every 800 rounds, you want to know that. If one magazine causes three failures across two range trips, you want to know that. If a screw keeps loosening, you want to know when it was torqued and what thread treatment was used.
Data beats vibes. Usually. Vibes are still useful for guitar solos and suspicious gas station burritos.
You do not need to buy everything at once. Start with what supports the work you actually do.
A good beginner bench path starts with cleaning and safety basics, then moves into control tools, then support tools, then job-specific tools only when the job requires them.
Do not buy tools just because the internet told you “real gunsmiths have this.” Buy tools because they solve a real problem on your bench.
Most beginner mistakes are predictable. That is good news because predictable mistakes are easier to avoid.
Do not touch anything until the firearm is verified unloaded and ammunition is away from the bench.
Firearm screws are easy to damage. Use hollow-ground bits that fit properly.
Some pins are directional. Some are retained. Some are under tension. Verify before hammer time.
Photos are cheap. Replacement parts, shipping, and shame are not.
A new part may hide the real issue or create another one.
Lubrication matters, but more is not always better. Excess oil can attract debris and create mess.
Do not randomly polish engagement surfaces, feed ramps, chambers, or internal parts because someone online made it sound easy.
If you took it apart, cleaned it, changed something, or reassembled it, verify it works correctly.
A qualified gunsmith is not a defeat button. Sometimes they are the correct tool.
Stop and get qualified help when you are dealing with:
Probably fine is not the standard. Especially not with firearms.
The Real Goal
DIY gunsmithing is not just about learning how to take things apart. Anyone can take things apart. The skill is knowing what to touch, what not to touch, what to inspect, what a symptom means, which tool to use, when to stop, when to test, and when to ask for help.
Diagnose first. Modify second. And sometimes, do not modify at all.
The best DIY gunsmithing habit is not aggression. It is patience. Slow down, make the firearm safe, understand the job, use the right tools, inspect the obvious, document your work, and verify function before you call it done.
That is how you build skill. That is how you avoid damage. That is how you become more self-reliant without becoming your own worst gunsmith.
Training matters. Tools matter. Judgment matters most.

Disassembly & Reassembly
Are you trying to figure out how to field strip the Beretta 84 or Beretta 85 so you can clean it and…

Disassembly & Reassembly
Are you having problems with failure to extract or failure to fire out of a Beretta 84 or 85? Your problem could…

Disassembly & Reassembly
Complete step-by-step guide to reassembling a Beretta 80 series slide (81, 82, 84, 85 F and FS models). Covers firing pin, block, retaining pins, extractor, tools, and common mistakes — with video walkthrough.

Disassembly & Reassembly
Beretta 80 Series Frame Disassembly: 84, 85, 81 Step-by-Step Guide Do you need to replace a trigger bar, inspect your sear spring,…

Disassembly & Reassembly
Video Walkthrough After you have completed repairs or replaced parts in your Beretta 80 Series pistol, you will need to put it…
Everything
Your AK Just Stopped Running. Here Is How to Bring It Back. It ran fine for 500 rounds, then it stopped extracting.…