- Quick Diagnostic Table
- Safety First: Before You Touch Anything
- Model and Compatibility Warning
- Before Replacing Parts: The Diagnostic Order
- Failure to Feed: The Round Nose-Dives or Stops Halfway
- Step 1: Field Check
- Step 2: Magazine Diagnosis
- Step 3: Workbench Fix
- Failure to Eject: The Case Stays in the Gun
- Step 1: Field Check
- Step 2: Range Diagnosis
- Step 3: Workbench Fix
- Failure to Extract: The Case Is Stuck in the Chamber
- Step 1: Field Check
- Step 2: Extractor Tension Test
- Step 3: Workbench Fix
- Light Primer Strikes: Click, No Bang
- Step 1: Field Check
- Step 2: Slide Diagnosis
- Step 3: Frame Diagnosis
- Double Feed: Two Rounds Try to Enter the Chamber
- Step 1: Identify the Type
- Step 2: Workbench Fix
- Slide Not Staying Open After Last Round
- Step 1: Field Check
- Step 2: Workbench Fix
- Trigger Does Not Reset
- Step 1: Field Check
- Step 2: Workbench Fix
- Locking Block Wear or Failure
- Step 1: Field Strip Inspection
- Step 2: Workbench Fix
- TRB Conservative Maintenance Schedule
- FAQ
- Conclusion
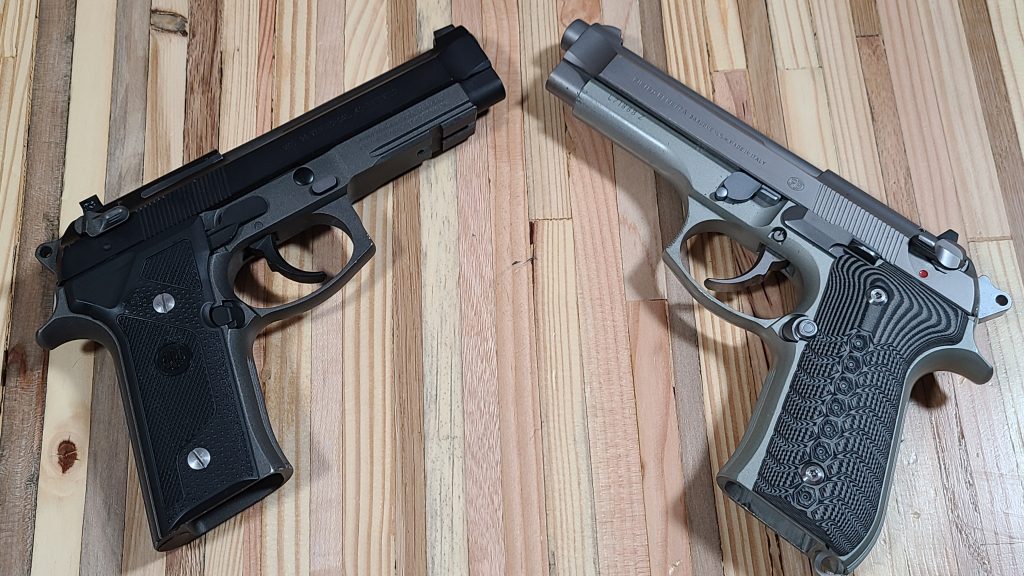
The Beretta 92 series has been in service with military and law enforcement worldwide since 1976, with over 3 million produced. This guide walks you through the most common Beretta 92 malfunctions: Symptom → Diagnosis → Fix.
This is written for the shooter with a problem on the bench right now, not for the armchair collector.
Before you start: Beretta 92FS, 92A1, M9, M9A1, M9A3, 92X, and 96 series parts vary by model and generation. Verify every part against your exact pistol before ordering. What works on a 92FS may not work on a 92X or an early 92S.
Quick Diagnostic Table
Bookmark this table. When your 92 acts up, start here.
| Symptom | Most Likely Cause | First Check | Severity | Start Here |
|---|---|---|---|---|
| Failure to Feed | Weak magazine spring, bent feed lips, worn follower | Try a known-good magazine first | Range Fix / Bench Fix | Failure to Feed |
| Failure to Eject | Weak extractor spring, worn extractor hook, dirty breech face | Field strip, inspect extractor hook tension | Range Fix / Bench Fix | Failure to Eject |
| Failure to Extract | Chipped extractor hook, weak extractor spring, carbon-caked chamber | Check extractor tension with snap cap | Range Fix / Bench Fix | Failure to Extract |
| Light Primer Strikes | Dirty firing pin channel, weak hammer spring, broken firing pin | Detail clean firing pin channel and breech face | Range Fix / Bench Fix | Light Primer Strikes |
| Double Feed | Weak magazine spring, worn follower, short-stroking | Mark magazines, isolate the offender | Range Fix / Bench Fix | Double Feed |
| Slide Not Staying Open | Weak slide catch spring, worn follower, thumb riding lever | Test with empty mag, finger off lever | Range Fix / Bench Fix | Slide Not Staying Open |
| Trigger Does Not Reset | Broken trigger return spring | Visual inspect with slide off | Bench Fix | Trigger Reset |
| Locking Block Failure | Cracked locking block lugs, worn plunger, slide rail cracks | Field strip, inspect block and slide rails | Bench Fix / Gunsmith | Locking Block |
Safety First: Before You Touch Anything
WARNING: If live ammo is on the bench during troubleshooting, you are already doing it wrong.
Follow this checklist before any diagnostic work:
CHECK 1: Drop the magazine and rack the slide three times. Lock it open. Visually and physically inspect the chamber.
CHECK 2: Remove all ammunition from the bench. A mag in your pocket is a mag on the bench.
CHECK 3: Wear safety glasses. Springs under tension and small parts can launch.
CHECK 4: Work over a parts tray or white towel. The Beretta 92 has a trigger return spring that loves to fly across the room.
Use snap caps for function testing. They let you diagnose feeding and extraction problems without introducing live ammo into the equation. Never use live rounds for dry-fire or function checks.
Pro Tip: Buy quality snap caps and mark them clearly. Cheap plastic dummies can fragment and cause their own feeding problems. Aluminum snap caps usually last longer and feed more consistently.
Model and Compatibility Warning
COMPATIBILITY WARNING: Beretta 92FS, 92A1, M9, M9A1, M9A3, 92X, and 96 series parts are NOT universally interchangeable. Verify every part against your exact model before ordering.
Know your pistol:
- Beretta 92FS: The standard civilian and military model. Open-top slide, double-action/single-action trigger, manual safety/decocker on the slide. Most common configuration.
- Beretta M9 / M9A1 / M9A3: Military variants. The M9A1 adds a Picatinny rail and checkered backstrap. The M9A3 adds a threaded barrel, improved sights, and a wrap-around grip. Most internal parts interchange with the 92FS.
- Beretta 92X: Updated frame with a replaceable front sight, improved ergonomics, and some internal spring changes. The slide catch and some springs differ from the 92FS.
- Beretta 96: Chambered in .40 S&W. Uses a different barrel, locking block, and magazine. Some small parts interchange with the 92, but not the major components.
Do not assume parts interchange. Do not assume they do not interchange without verification. When in doubt, contact Beretta customer service with your serial number.
Before Replacing Parts: The Diagnostic Order
This section matters. Most pistol problems are not parts problems. They are cleanliness, ammunition, or technique problems. Do not start ordering parts until you have run through this checklist.
DIAGNOSTIC RULE: Clean before replacing. Inspect before buying. A dirty chamber causes more extraction failures than a worn extractor ever will.
Follow this order:
- Change the ammo. If the malfunction only happens with one brand or batch, the problem may not be the pistol. Try factory-loaded ammunition from a reputable manufacturer.
- Verify magazine function. Mark your magazines (A, B, C) and test with a known-good one. Beretta 92 failures are magazine-related more often than not.
- Clean the chamber. Use the least aggressive brush that removes the fouling. A nylon or bronze chamber brush is normally enough. Avoid steel tools or anything that changes chamber geometry.
- Clean the breech face and extractor channel. Carbon buildup on the breech face can prevent proper extractor engagement. Clean the breech face, extractor hook, and extractor channel thoroughly.
- Test with snap caps. If the problem happens with live ammo but not snap caps, suspect ammunition issues. If it happens with snap caps too, you have a mechanical problem.
- Inspect specific wear parts. Only after cleaning and testing should you inspect extractors, springs, and locking blocks for wear.
- Replace only failed parts. Do not shotgun parts at the problem. Replace the one part that failed inspection.
- Stop at safety-critical damage. If you find a cracked slide, damaged frame rails, or trigger group damage, stop and call a gunsmith.
Useful bench tools for this diagnostic process: 9mm snap caps, chamber brush set, quality CLP or solvent, cleaning patches, a bore light, a non-marring bench block, and a proper punch set.
Workbench Pick Factory OEM spring and small parts kit for Beretta 92/96 series. Includes recoil spring, extractor spring, firing pin…
Beretta 92/96 Service Pak
Failure to Feed: The Round Nose-Dives or Stops Halfway
What it looks like: You rack the slide or fire a round, but the next round does not chamber fully. It nose-dives into the feed ramp or stops halfway into the chamber. The slide may not close completely.
Why it happens: The magazine spring has weakened and cannot push the next round up fast enough. The feed lips are bent or spread, causing the round to release at the wrong angle. The magazine follower is cracked or worn, allowing the rounds to tilt. The recoil spring is weak, slowing the slide and reducing feed force. The shooter is riding the slide forward instead of letting it snap closed.
This is different from a double feed. A failure to feed means one round did not enter the chamber. A double feed means two rounds tried to enter at once.
Step 1: Field Check
Goal: Determine if the problem is magazine-specific, ammo-specific, or mechanical.
- CHECK: Does the failure happen with one magazine or all of them? If one, that magazine is the problem. If all, look at the recoil spring or ammo.
- TEST: Try a different brand of factory ammunition. Some hollow points with wide meplats hang up in early 92FS models. Round-nose ball ammo almost always feeds.
- CHECK: Are you riding the slide forward? Let the slide go with authority. Guiding it forward by hand is a common cause of failure to feed.
- INSPECT: Look at the feed ramp. It should be smooth and polished. A rough feed ramp can slow the round and cause timing issues.
Problem follows one magazine? That magazine is the offender. Disassemble and inspect it.
Problem happens with all magazines? Look at the recoil spring or ammunition.
Problem only with hollow points? Try round-nose ball ammo or a different hollow point profile.
Step 2: Magazine Diagnosis
Goal: Inspect the magazine for wear and damage.
- DISASSEMBLE: Remove the magazine base plate and take out the spring and follower.
- INSPECT: Check the follower for cracks, chips, or excessive wear. The follower should move smoothly in the magazine body without tilting or binding.
- CHECK: Inspect the feed lips with calipers. Beretta factory lips should measure approximately 0.380 inch at the rear. Spread or bent lips cause nose-dives.
- TEST: Compare the spring tension to a new magazine spring. If the old spring feels weaker, replace it. Do not stretch magazine springs. It does not work.
Follower cracked or worn? Replace the follower.
Feed lips bent? Replace the magazine body. Attempting to bend them back rarely holds.
Spring weak? Replace with a factory-weight or +10% power spring.
Step 3: Workbench Fix
Goal: Replace worn magazine parts and inspect the recoil spring.
WARNING: Magazine springs are under tension. Wear eye protection and work over a tray. The base plate can launch across the room if you are not careful.
- REPLACE: Install a new magazine spring and follower if they failed inspection.
- INSPECT: Check the recoil spring. A weak recoil spring slows the slide and reduces feed force. Replace every 5,000 rounds.
- TEST: Load the magazine with snap caps and cycle them through the pistol 10 times. Each round should feed smoothly into the chamber.
| Symptom | Likely Cause | How to Confirm | Fix | Skill Level |
|---|---|---|---|---|
| Round nose-dives into feed ramp | Bent or spread feed lips | Measure lip width with calipers | Replace magazine body | Beginner |
| Round stops halfway in chamber | Weak magazine spring | Compare spring tension to new spring | Replace magazine spring | Beginner |
| Failure with all magazines | Weak recoil spring | Test with snap caps; check spring weight | Replace recoil spring | Intermediate |
Parts mentioned in this section: magazine spring and follower. Verify the correct Beretta parts for your exact model before ordering.
Workbench Pick Factory-weight recoil spring for Beretta 92/96 full-size pistols. Replace every 5,000 rounds for reliable cycling.
Beretta 92/96 13 lb Recoil Spring
Failure to Eject: The Case Stays in the Gun
What it looks like: You fire a round, but the empty case remains partially in the chamber or stuck between the slide and barrel (stovepipe). The slide may not close because the brass is in the way.
Why it happens: The extractor is not holding the case against the breech face with enough tension. The extractor spring has weakened. The extractor hook is worn or chipped. The ejector on the frame is damaged or worn. Underpowered ammunition does not generate enough slide velocity for reliable ejection.
Extraction vs. Ejection — Know the Difference: Extraction is the extractor pulling the case out of the chamber. Ejection is the ejector kicking the case out of the gun. A failure to extract means the case stays in the chamber. A failure to eject means the case leaves the chamber but does not clear the ejection port. If the case is still in the chamber, you have an extraction problem. If the case is out of the chamber but stuck in the gun (stovepipe, brass hanging out the side), you have an ejection problem. This section covers ejection. If the case never leaves the chamber, go to Failure to Extract.
Step 1: Field Check
Goal: Determine if the extractor is engaging the case rim.
- CHECK: Is the brass partially out of the chamber (stovepipe)? This means the extractor lost grip before the ejector could kick it out.
- INSPECT: Field strip the pistol. Look at the extractor claw on the right side of the slide. It should have a sharp, square hook that bites into the case rim.
- TEST: Press a snap cap against the bolt face. The extractor hook should snap over the rim with positive tension. The cap should stay captured and not fall free.
- CHECK: Does it happen with one ammo type? Some underpowered reloads do not generate enough slide velocity for reliable ejection.
Extractor engages properly? Continue to Step 2.
Extractor does not engage? The extractor hook may be broken, chipped, or worn round. Proceed to Step 3.
Step 2: Range Diagnosis
Goal: Isolate whether the problem is ammo-related or mechanical.
- CYCLE: Load a snap cap into the chamber. Cycle the slide vigorously. The extractor should hold the snap cap firmly against the breech face every time.
- TRY: Try a different brand of factory ammunition. Some reloads have weak powder charges that cause short-stroking.
- INSPECT: Look at the ejector on the left side of the frame. It should be straight, unchipped, and protrude enough to contact the case rim. A damaged ejector will cause erratic ejection even if the extractor is fine.
- CHECK: If ejection only fails with one brand of cheap ammo, do not blame the extractor yet.
Problem follows one ammo type? Change ammunition.
Problem continues with different ammo? Proceed to Step 3.
Step 3: Workbench Fix
Goal: Replace the extractor and extractor spring if they failed inspection.
WARNING: The extractor is retained by a small roll pin and is under spring tension from the extractor plunger. Work over a padded surface or parts tray. Pieces can and will launch across the room if you are not careful.
- REMOVE: Field strip the pistol. Remove the slide. The extractor is on the right side, retained by a 1/16-inch roll pin.
- REMOVE: Support the slide in a padded vise or bench block. Use the correct punch to remove the pin while controlling the spring-loaded plunger.
- INSPECT: Compare the old extractor to a new one. Look for rounded edges, chips, or cracks. A worn extractor hook often looks polished and rounded at the tip.
- INSTALL: Install the new extractor and extractor spring using the correct Beretta parts for your exact model.
- TEST: Reassemble and cycle snap caps 20 times. The extractor should hold the snap cap firmly against the breech face.
| Symptom | Likely Cause | How to Confirm | Fix | Skill Level |
|---|---|---|---|---|
| Stovepipe (brass sticking up) | Weak extractor spring | Test extractor tension with snap cap | Replace extractor spring and plunger | Intermediate |
| Brass ejects weakly or erratically | Damaged ejector | Visual inspect ejector on frame | Replace ejector (gunsmith recommended) | Advanced |
| Hook rounded or chipped | Worn extractor | Compare to new extractor | Replace extractor | Intermediate |
Parts mentioned in this section: extractor and extractor spring. Verify the correct Beretta parts for your exact model before ordering.
TRB take: The extractor is the most common failure point for ejection issues on high-round-count Beretta 92s. If you are past 10,000 rounds and have not replaced it, you are running on borrowed time.
Workbench Pick +10% power magazine springs for Beretta 92 series. Three-pack. Replace weak magazine springs for reliable feeding.
Beretta 92 Extra Power Magazine Springs
Failure to Extract: The Case Is Stuck in the Chamber
What it looks like: You fire a round, but the empty case remains stuck in the chamber. The slide moves but the case stays put. The extractor slips over the rim and the case does not budge.
Why it happens: The extractor never gripped the rim, or the case is physically stuck. The Beretta 92’s open-slide design exposes the chamber to more debris than a closed-slide pistol, so carbon buildup is a real factor. A bulged case, overpressure round, or carbon weld can also stick the case in the chamber.
Step 1: Field Check
Goal: Determine if the case is stuck or the extractor is not engaging.
- CHECK: Does the slide move but the case stays put? The extractor is not engaging.
- CHECK: Does the slide barely move? The case may be stuck from overpressure, a bulged case, or carbon weld.
- WARNING: Tap-rack-bang will not fix a stuck case. For a fired case stuck in the chamber, lock the slide back and use a proper cleaning rod with a brass or polymer jag to push the case out from the muzzle end. Do not use steel tools. If the case will not move with gentle pressure, stop and take it to a gunsmith. For a stuck live round, stop immediately. Do not attempt to clear it yourself. Take the pistol to a qualified gunsmith.
Step 2: Extractor Tension Test
Goal: Verify the extractor is gripping the rim properly.
- TEST: With the slide removed, press on the extractor claw. It should snap back into place with positive tension.
- TEST: Insert a snap cap into the extractor hook. The cap should stay captured and not fall free. If it drops out, the extractor spring is weak or the hook is worn.
- INSPECT: Look at the breech face for carbon buildup. A carbon-caked breech face prevents the extractor from seating fully against the case rim.
Snap cap stays captured? The extractor is engaging. Look at the chamber.
Snap cap drops out? The extractor spring is weak or the hook is worn. Proceed to Step 3.
Step 3: Workbench Fix
Goal: Clean the chamber and replace weak extractor parts.
- CLEAN: Clean the chamber with a 9mm chamber brush and solvent. Carbon buildup in the chamber is the most common cause of sticky extraction.
- REPLACE: Replace the extractor spring and plunger if tension is weak.
- REPLACE: If the extractor hook is chipped, replace the extractor. Do not attempt to reshape it. The geometry is too precise for hand-filing.
- INSPECT: Check the chamber for roughness or pitting. A rough chamber causes sticky extraction regardless of extractor condition.
| Symptom | Likely Cause | How to Confirm | Fix | Skill Level |
|---|---|---|---|---|
| Case stuck in chamber | Carbon buildup | Visual inspect chamber; brush test | Clean chamber with brush and solvent | Beginner |
| Extractor slips over rim | Weak extractor spring | Snap cap tension test | Replace extractor spring and plunger | Intermediate |
| Hook chipped or rounded | Worn extractor | Visual compare to new extractor | Replace extractor | Intermediate |
Light Primer Strikes: Click, No Bang
What it looks like: You pull the trigger, the hammer falls, but the round does not fire. The primer shows a light dent or no dent at all.
Why it happens: The firing pin is not striking the primer with enough force. The firing pin channel is gummed up with carbon and oil residue. The firing pin spring is weak. The hammer spring (mainspring) has lost tension. The firing pin tip is broken or chipped.
Step 1: Field Check
Goal: Determine if the problem is DA-only, SA-only, or both.
- CHECK: Does the primer show a light dent or no dent at all? A light dent means the pin struck but not hard enough. No dent means the pin never reached the primer.
- TEST: Does it happen in double-action, single-action, or both? Double-action only suggests a mainspring issue. Both suggests a firing pin or channel issue.
- TRY: Try different ammo. Hard primers (some European surplus) will fail where American commercial primers ignite.
Double-action only? Suspect the hammer spring. Proceed to Step 3 (Frame Diagnosis).
Both DA and SA? Suspect the firing pin or channel. Proceed to Step 2.
Step 2: Slide Diagnosis
Goal: Inspect the firing pin and channel.
- REMOVE: Remove the slide and take out the firing pin assembly. The firing pin should move freely in its channel.
- CLEAN: Clean the firing pin channel with pipe cleaners soaked in gun scrubber or solvent. Allow it to dry completely.
- INSPECT: Look at the firing pin tip. It should be rounded and unchipped. A broken tip will cause light strikes or misfires.
- TEST: Check the firing pin spring. It should compress and return with firm tension. If it feels weaker than a new spring, replace it.
Firing pin moves freely and tip is good? The channel is clear. Check the hammer spring.
Firing pin gritty or tip chipped? Clean or replace the firing pin.
Step 3: Frame Diagnosis
Goal: Inspect the hammer spring and mainspring strut.
- REMOVE: Remove the grips from the frame. The hammer spring (mainspring) and strut are visible at the rear of the frame.
- INSPECT: Look at the hammer spring (mainspring) and strut. A cracked or collapsed mainspring will not generate enough energy for reliable primer ignition in double-action. Look for kinks, cracks, or compression set in the spring coils.
- TEST: Compare the hammer spring tension to a new spring. If it feels weaker, replace it.
Pro Tip: The hammer spring is the single most important spring in the gun for ignition reliability. Replace it every 10,000 rounds or if you notice the double-action trigger pull getting lighter.
| Symptom | Likely Cause | How to Confirm | Fix | Skill Level |
|---|---|---|---|---|
| Light dent on primer | Weak firing pin spring | Test spring tension; inspect pin tip | Replace firing pin spring | Intermediate |
| No dent on primer | Broken firing pin | Visual inspect pin tip and body | Replace firing pin | Intermediate |
| DA only, SA fine | Weak hammer spring | Compare spring to new; check DA pull weight | Replace hammer spring | Advanced |
Double Feed: Two Rounds Try to Enter the Chamber
What it looks like: Two rounds are present at the chamber mouth. Either a spent case is still in the chamber and a live round is trying to feed into it, or two live rounds have both risen from the magazine and jammed together nose-to-rim. The slide is typically stuck partially open.
Why it happens: The cause depends on what you actually see. Do not assume all double feeds have the same source. Look at the brass before you diagnose.
Step 1: Identify the Type
Goal: Determine which of four double-feed types you have.
- TYPE A — Spent case still in chamber, live round behind it: The extractor failed to pull the fired case out, or it pulled it but the ejector did not clear it. This is an extraction or ejection failure masquerading as a double feed. Diagnose extraction first: inspect the extractor hook, extractor spring, and breech face.
- TYPE B — Two live rounds jammed at the chamber mouth: The magazine fed two rounds simultaneously. Causes: bent feed lips, worn follower, or weak magazine spring allowing both rounds to rise. Inspect the magazine.
- TYPE C — Happens only when manually cycling or loading: The shooter is riding the slide forward or not releasing the slide with full force. The slide lacks the momentum to strip and feed one round cleanly. Let the slide snap closed under its own spring tension.
- TYPE D — Happens repeatedly during live fire: The extractor is slipping off the rim, leaving the spent case in the chamber while the next round feeds. Or the recoil spring is weak and the slide is short-stroking. Or the chamber is carbon-fouled and cases are sticking. Or the ammunition is underpowered and the slide is not cycling fully. Or the magazine is feeding two rounds. Work through extraction, then magazine, then recoil spring.
Spent case in chamber? Go to Failure to Extract section first.
Two live rounds? Inspect the magazine feed lips and follower.
Only when hand-cycling? Technique issue. Release the slide from full lock.
Repeats in live fire? Check extractor, chamber, magazine, recoil spring, and ammo in that order.
Step 2: Workbench Fix
Goal: Fix the specific cause identified in Step 1.
- For Type A (spent case in chamber): Clean the chamber and extractor channel. Replace the extractor spring. Inspect the extractor hook for chips or rounding. See Failure to Extract section.
- For Type B (two live rounds): Disassemble the magazine. Replace the spring if it is weak. Replace the follower if it is cracked or worn. Replace the magazine body if feed lips are bent or spread.
- For Type C (manual cycling only): No parts needed. Pull the slide fully to the rear and release it. Do not guide it forward. Test with snap caps until the motion is automatic.
- For Type D (live fire repeat): Detail clean the chamber and breech face. Replace the extractor spring. Test with a known-good magazine. Replace the recoil spring if it is past 2,500 rounds. Try different factory ammunition.
Slide Not Staying Open After Last Round
What it looks like: You fire the last round, but the slide does not lock open. It closes on an empty chamber. Or the slide locks open with rounds still in the magazine.
Why it happens: The slide catch spring is weak and cannot hold the lever up. The magazine follower is worn and does not push the lever up. The shooter is riding the slide catch lever with their thumb. The slide notch is rounded and slips past the lever.
Step 1: Field Check
Goal: Determine if the problem is technique or mechanical.
- TEST: With an empty magazine inserted, rack the slide. Does it lock? If yes, the problem is ammo-related or technique-related.
- TEST: If it does not lock with an empty mag, try a different magazine. If it locks with a different mag, the first mag’s follower or spring is the problem.
- CHECK: Are you pressing the slide catch lever with your thumb? Many shooters do this without realizing it. Move your thumb down and away from the lever.
Locks with empty mag when you move thumb? Technique issue. Practice grip.
Does not lock with any empty mag? Mechanical issue. Proceed to Step 2.
Step 2: Workbench Fix
Goal: Replace worn parts.
- INSPECT: Field strip the pistol. Inspect the slide catch lever on the left side of the frame. It should move freely and spring back when pressed.
- REPLACE: Remove the slide catch lever and inspect the spring. If the spring is kinked or weak, replace it.
- INSPECT: Check the magazine follower. The follower should have a raised shelf on the left side that pushes up on the slide catch lever. If the shelf is worn, replace the follower.
- INSPECT: Check the slide notch. The notch should be sharp and unrounded. A rounded notch will slip past the lever.
Trigger Does Not Reset
What it looks like: You fire a shot, but the trigger stays back and does not return forward. The pistol will not fire again until you manually push the trigger forward.
Why it happens: The trigger return spring is broken or disconnected. On the Beretta 92, this is a flat wire spring that sits under the trigger bar and wraps around a pin. It is under significant tension and can break on high-round-count guns.
Step 1: Field Check
Goal: Determine if the spring is broken or disconnected.
- TEST: Does the trigger move forward if you push it? If yes, the spring is weak or disconnected.
- TEST: Does the trigger stay back with no tension? The spring is probably broken.
Step 2: Workbench Fix
Goal: Replace the trigger return spring.
WARNING: The trigger return spring is under significant tension. Wear eye protection and work over a tray. The spring can launch across the room if you are not careful.
- FIELD STRIP: Remove the slide from the frame in the normal manner. Leave the frame components in place.
- ACCESS: Look at the trigger bar and trigger return spring inside the frame. On the 92FS, the trigger return spring is a flat wire spring that wraps around a pin in the frame and has two legs: one pushing the trigger bar rearward, one pushing the trigger forward.
- INSPECT: With the slide off, manually cycle the trigger. Watch the spring legs move. If either leg is broken, disconnected, or the spring is loose on the pin, replace it.
- REPLACE: Install a new trigger return spring. Verify it seats properly on the pin and both legs engage the trigger bar and frame. The 92FS spring is not interchangeable with 92X or 96 variants. Order for your exact model.
- TEST: Reassemble and dry-fire the pistol 10 times. The trigger should return forward with positive pressure after each shot.
TRB take: The trigger return spring is a known weak point on Beretta 92s that see heavy use. Keep a spare in your range bag. The spring is cheap insurance against a dead trigger.
Locking Block Wear or Failure
What it looks like: Vertical play in the slide when the gun is in battery. Cracking sounds during cycling. Visible cracks in the locking block lugs or the slide rails at the locking block engagement area. In early stages, you may notice brass shaving on the breech face or a change in ejection pattern.
WARNING: If you see cracks in the slide or locking block, stop shooting immediately. A cracked slide can fail catastrophically during firing.
Why it happens: The locking block is part of the barrel/locking block assembly. It interfaces with the slide’s internal locking surfaces to hold the barrel and slide together during firing. It takes enormous stress and will eventually show wear or fail. This is not always a cracked slide. Most locking block issues are worn lugs, a worn plunger, or peening on the barrel lug area long before the slide ever cracks.
Step 1: Field Strip Inspection
Goal: Remove the barrel/locking block assembly and inspect all wear surfaces.
- FIELD STRIP: Remove the slide from the frame in the normal manner. Remove the recoil spring and guide rod.
- REMOVE: Lift the barrel/locking block assembly out of the slide. On the 92FS, the locking block is integral to the barrel assembly and is retained by a plunger and spring in the block itself.
- INSPECT: Look at the locking block lugs (the two wings that engage the slide). They should be square and unchipped. Any rounding, cracking, or peening means the block is failing.
- INSPECT: Look at the barrel lug area where the locking block interfaces. Check for cracks or excessive wear in the barrel lug recess.
- INSPECT: Look at the slide’s internal locking surfaces where the block engages. Check for cracks, peening, or galling, especially at the rear corners of the locking engagement area.
- TEST: Check the locking block plunger and spring. Depress the plunger. It should move freely and return with positive spring tension. A weak or sticky plunger causes inconsistent lockup.
Locking block lugs look good? Replace the plunger and spring as preventive maintenance.
Cracks in the locking block? Replace the block immediately.
Cracks in the slide rails? The slide is unsafe. Replace it. Do not attempt to weld or repair a cracked slide.
Step 2: Workbench Fix
Goal: Replace the locking block and inspect the slide.
- REPLACE: Install a new locking block upgrade kit. The upgraded block has reinforced lugs that last longer than the original.
- REPLACE: Replace the locking block plunger and spring as a set. Do not reuse worn small parts.
- INSPECT: Check the slide rails. If the slide shows cracks at the locking block engagement area, the slide is unsafe. Replace it.
- TEST: Reassemble and cycle snap caps 20 times. The slide should lock up tight with no vertical play.
| Symptom | Likely Cause | How to Confirm | Fix | Skill Level |
|---|---|---|---|---|
| Vertical play in slide | Worn locking block lugs | Visual inspect lugs for rounding | Replace locking block | Intermediate |
| Cracking sounds during cycling | Cracked locking block or slide | Detailed visual inspect under magnification | Replace damaged parts | Intermediate |
| Slide rail cracks | Catastrophic slide failure | Visual inspect rear corners of block recess | Replace slide (gunsmith recommended) | Advanced / Gunsmith |
TRB take: The locking block is a wear item. Beretta does not publish a replacement interval, but most armorers suggest inspection every 5,000 rounds and replacement at 10,000. If you carry this gun for duty or defense, do not wait for the block to fail.
Workbench Pick Upgraded locking block with reinforced lugs, plunger, and spring for Beretta 92FS and later models.
Beretta 92FS Locking Block Upgrade Kit
TRB Conservative Maintenance Schedule
Note: Beretta does not publish specific round-count replacement intervals for most wear parts. The schedule below is TRB’s conservative recommendation based on armorer experience, not factory guidance. Your mileage will vary with ammunition type, climate, and shooting volume. Inspect parts before replacing them.
| Interval | Action |
|---|---|
| Every range session | Field strip, brush and patch bore, wipe slide rails, re-lubricate |
| 500 rounds | Detail strip slide, clean firing pin channel, inspect extractor |
| 2,500 rounds | Replace recoil spring |
| 5,000 rounds | Inspect locking block, replace magazine springs |
| 10,000 rounds | Replace locking block, replace hammer spring, inspect slide rails for cracks |
FAQ
Q: Is the Beretta 92 extractor really weak?
A: No. The extractor is robust when clean and properly sprung. The problem is usually a weak extractor spring or a carbon-caked breech face, not the extractor itself. Clean the channel and replace the spring before you blame the claw.
Q: Should I upgrade to a D-spring or reduced-power hammer spring?
A: A reduced-power hammer spring lightens the double-action trigger pull but increases the risk of light primer strikes, especially with hard-primer ammo. If this is a duty or defense gun, stick with the factory hammer spring. Save the light springs for competition guns where reliability is less critical than trigger feel.
Q: Can I use M9 parts in a 92FS?
A: Most M9 and 92FS parts are interchangeable. The exceptions are the slide catch lever (M9A1 has a checkered face), some trigger springs, and the locking block on early 92S models. When in doubt, order parts for your specific model.
Q: My 92 jams with hollow points. Is the gun defective?
A: Probably not. Early 92FS models have a steep feed ramp. Some hollow points with wide meplats hang up. Try a different hollow point profile, or have a gunsmith polish the feed ramp. Round-nose ball ammo almost always feeds.
Q: How do I know if my locking block is the old or upgraded style?
A: The upgraded locking block for the 92FS has a wider lug profile and is marked differently. If your gun was manufactured after 2005, it likely has the upgraded block. If you are unsure, replace it with the current factory part.
Conclusion
The Beretta 92 is a durable, accurate pistol that will run for thousands of rounds if you respect the wear items. The magazine springs, extractor spring, recoil spring, and locking block are not lifetime parts. Replace them on schedule and the gun will outlast you.
Know your limits. If the slide is cracked, the frame is damaged, or you are uncomfortable working on the fire control group, stop and take the gun to a qualified gunsmith. A Beretta 92 is not a disposable gun, but it is also not a candidate for amateur frame welding or slide repair.
When in doubt, clean first. Carbon is the enemy of function. Most feeding, extraction, and firing pin issues clear up with a thorough cleaning before you spend money on parts.
I have a complete series of Beretta 92 disassembly and reassembly videos in my Disassembly and Reassembly section on the website.
