
Everything
Beretta 92/96/M9 Troubleshooting Guide
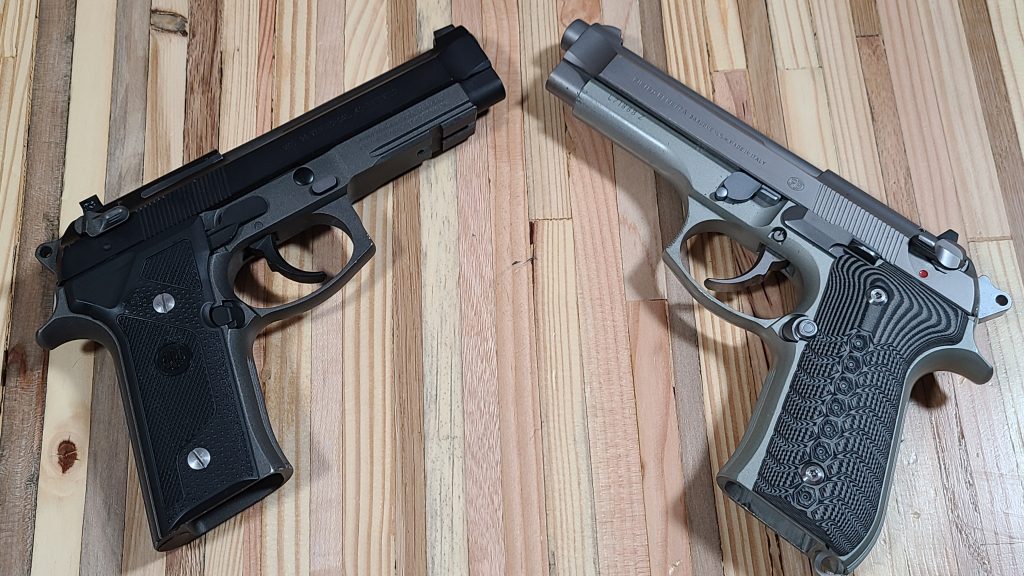
The Beretta 92 series has been in service with military and law enforcement worldwide since 1976, with over 3 million produced. This…
Start Here
Avoid the beginner mistakes that turn simple firearm maintenance into scratched parts, lost springs, stripped screws, bad diagnoses, and expensive lessons. This page shows what usually goes wrong and how to slow down before the bench gets ugly.
Avoid The Dumb Stuff
Rushing, guessing, forcing parts, skipping photos, ignoring the manual, and using the wrong tool are how small jobs become expensive stories. Slow down, check first, and let the process save you from yourself.
Common Mistakes
Most DIY gunsmithing mistakes are not dramatic. They are small decisions made too fast: skipping the safety check, using the wrong tool, forcing a part, ignoring the manual, or replacing parts before figuring out what actually went wrong.
Bench Rule
A good DIY gunsmith is not the person with the biggest tool pile. It is the person who knows when to stop, check, verify, and avoid turning confidence into damage.
Most beginner mistakes happen for one of three reasons: rushing, guessing, or using the wrong tool.
Rushing makes people skip checks. Guessing makes people replace parts they did not need. The wrong tool turns normal screws, pins, springs, and parts into a crime scene with a receipt.
The good news is that most of these mistakes are avoidable. You do not need to know everything. You just need a better process.
Make the firearm safe. Understand the job. Use the right tool. Support the part. Move slowly. Take photos. Check your work. Know when to stop.
That simple pattern prevents most of the dumb stuff before it gets expensive.
This is the big one.
Before cleaning, inspecting, disassembling, troubleshooting, or doing any bench work, verify the firearm is unloaded.
Do not trust memory. Do not trust what someone told you. Do not trust “I already checked it.” Check it again.
The safety check is not a formality. It is the first tool you use.
Live ammunition does not belong on the workbench during cleaning, dry function checks, disassembly, or reassembly.
Not beside the mat. Not in a loaded magazine nearby. Not in a box within reach because “I know it is there.”
Move it away from the work area.
This is one of those habits that feels overly cautious right up until it prevents a stupid mistake. The bench is for tools, parts, inspection, and controlled work. Ammo can wait somewhere else like an adult.
A lot of problems start when someone begins taking parts off before they know what they are trying to accomplish.
Before you touch a tool, ask:
If the answer to most of those is “kind of,” slow down.
“Kind of” is where springs disappear, pins get bent, and projects become multi-day hostage situations.
The wrong screwdriver is one of the fastest ways to scar a firearm.
Many firearm screws need bits that fit properly. A loose, tapered, or poorly fitted bit can slip, chew up the screw head, scratch the finish, or strip the fastener.
Use properly fitted hollow-ground bits when working with slotted firearm screws. Use the correct Torx or hex bit when required. If the bit rocks, slips, or does not fill the screw head correctly, stop and find the right one.
A damaged screw is more than ugly. It can become harder to remove, harder to torque correctly, and more likely to create problems later.
The wrong bit turns a thirty-second job into a tiny metal grudge match.
Pins need support.
If you drive a pin without supporting the part correctly, the force can bend, flex, crack, or mar the surrounding area. A bench block exists for a reason. Use it.
Before driving a pin, ask:
Do not use nails, drill bits, random hardware, or “close enough” objects as punches.
Close enough is how benches become confession booths.
Some parts need firm movement. That does not mean every stuck part needs a bigger swing.
If something does not move, stop and ask why.
It could be:
The hammer should not become your personality.
When something feels wrong, verify the process before adding force.
Your phone is one of the best tools on the bench.
Before removing parts, take photos of spring orientation, pin direction, screw locations, part order, trigger group layout, and anything that looks confusing.
Do not trust memory.
Memory is a liar with a parts tray.
Photos help you confirm how things looked before you touched them. They also help when a spring launches itself into another ZIP code and you need to know what direction it used to face before it chose freedom.
Springs, detents, pins, clips, plungers, and tiny screws are escape artists.
Use a mat, tray, divided organizer, magnetic bowl where appropriate, or small containers. Lay parts out in order. Keep assemblies together. Label things if needed.
Working over carpet is a bold strategy. Usually a bad one.
If a part is spring-loaded, control it before removing it. Wear eye protection. Use your thumb, a bag, or the correct tool to keep it from launching.
A lost detent can turn a simple job into a shipping-delay adventure.
Parts replacement is not troubleshooting.
If a firearm malfunctions, start with the simple causes first:
Replacing parts without diagnosis can hide the real issue or create a new one.
That is how you get the classic bench sentence: “Well, it did not do that before.”
Diagnose first. Modify second. Sometimes, do not modify at all.
Magazines cause a lot of malfunctions, and beginners often blame the firearm first.
A magazine controls feeding angle, cartridge presentation, spring pressure, follower movement, and timing. A bad magazine can make a good firearm look broken.
Check for:
Mark your magazines. If magazine number three keeps showing up at the scene of the crime, you found a suspect.
Ammo matters.
Different bullet shapes, pressures, recoil impulses, case materials, and overall lengths can change how a firearm behaves.
If a firearm only malfunctions with one ammo type, that matters. If it runs with known-good ammo but chokes on bargain-bin mystery rounds, that also matters.
Before blaming the gun, ask:
Sometimes the firearm is not broken. Sometimes it is just politely refusing to eat garbage.
Lubrication matters, but more is not always better.
Too little lubrication can cause friction, wear, and cycling problems. Too much lubricant can attract debris, migrate into places it does not belong, and make the firearm collect grime like it is training for a mud run.
Use the manufacturer’s lubrication guidance when available. Apply lubricant to the right places, in the right amount, for the firearm and conditions.
The goal is not to baptize the gun in oil.
The goal is controlled lubrication where it helps function.
This is where beginners can get into real trouble.
Random polishing can change geometry, remove protective finishes, reduce engagement, create unsafe conditions, or cause reliability problems.
Be extremely careful with:
If you do not fully understand what the surface does and what the consequences are, do not touch it.
A shiny mistake is still a mistake. It just photographs better.
Hard No
Power tools remove material quickly. That is the problem. If you do not know exactly what you are changing, why you are changing it, and how to verify it safely, step away from the spinning regret machine.
Thread locker can be useful when used correctly. It can also create problems when overused or used in the wrong place.
Use the type and amount recommended by the manufacturer. Clean threads when needed. Apply carefully. Do not flood screws, parts, or assemblies with it.
Too much thread locker can make future removal difficult, migrate into places it should not go, or create a mess that hardens into regret.
The goal is secure, not fossilized.
Optics, mounts, rings, action screws, chassis screws, and accessories often need specific torque values.
Too loose can shift, rattle, or lose zero. Too tight can strip threads, crack parts, crush tubes, damage mounts, or distort components.
Use a torque driver when torque matters. Follow manufacturer specs when available.
“That feels good” is not a measurement. It is a vibe with liability.
The job is not done when the parts are back together.
After cleaning, maintenance, reassembly, troubleshooting, or parts replacement, perform the correct safety and function check for that firearm.
Check that:
A function check does not replace live-fire testing, but it does help catch obvious problems before the firearm goes back into use.
A dry function check is important, but it does not prove everything.
Some problems only appear under live fire, including feeding problems, extraction problems, ejection issues, cycling problems, magazine issues, optic movement, zero shift, heat-related problems, and ammo sensitivity.
If the firearm had reliability issues, parts replaced, major cleaning, accessory changes, optic work, or anything that affects operation, it may still need range testing before you trust it fully.
The bench can tell you a lot. The range tells you the rest.
The manufacturer’s manual is not exciting. Use it anyway.
It may include field stripping instructions, lubrication points, function checks, torque values, ammo warnings, safety notes, and model-specific details you will not get from a random video.
This matters because firearms change across generations, models, and variants. A video that is almost right may still be wrong for your exact firearm.
Almost right is how small parts end up installed backward while someone says, “That is weird.”
Bad bench work happens when your brain leaves before your hands do.
If you are tired, frustrated, rushed, distracted, or trying to force a job before bed, stop.
That is when parts get forced, steps get skipped, and small mistakes become bigger ones.
There is nothing wrong with walking away and coming back later. The firearm will still be there. The part will still be stubborn. But you will be less likely to turn a simple issue into a story that starts with “so I got mad.”
Calling a qualified gunsmith is not failure.
It is the right move when the job involves safety-critical systems, pressure-bearing parts, unknown damage, or work you do not fully understand.
Get help with:
Self-reliance does not mean pretending to know everything. It means building enough judgment to know when the smart move is to stop.
The Real Fix
Slow down. Make the firearm safe. Read the manual. Use the right tools. Support the part. Take photos. Change one thing at a time. Verify function. Stop when something feels wrong.
Before starting bench work, run through this quick checklist:
After the work is done, check:
This is not complicated. That is the point. Simple checks prevent complicated problems.
DIY gunsmithing is not about proving you can force your way through a job.
It is about learning how the firearm works, using the right tools, respecting safety, diagnosing problems correctly, and knowing when to stop.
Most beginner mistakes happen when people rush past the basics. Do not do that.
Clear the firearm. Clear the bench. Use the right tool. Take photos. Support the part. Change one thing at a time. Verify your work.
That is how you avoid the dumb stuff.
And avoiding the dumb stuff is a severely underrated gunsmithing skill.
Everything
The Beretta 92 series has been in service with military and law enforcement worldwide since 1976, with over 3 million produced. This…
Pump Action Shotguns
Experiencing issues with your Mossberg 500? This guide offers solutions for common problems like feeding failures, ejection issues, misfires and more
Bags
A no-nonsense guide to choosing a range bag that actually works. Learn what separates a dedicated pistol range bag from a glorified gym duffel.
Disassembly & Reassembly
Are you trying to figure out how to field strip the Beretta 84 or Beretta 85 so you can clean it and…
Disassembly & Reassembly
Are you having problems with failure to extract or failure to fire out of a Beretta 84 or 85? Your problem could…
Disassembly & Reassembly
Complete step-by-step guide to reassembling a Beretta 80 series slide (81, 82, 84, 85 F and FS models). Covers firing pin, block, retaining pins, extractor, tools, and common mistakes — with video walkthrough.