- TL;DR – Quick Summary for Fast Readers
- Essential Tools Needed for Sig P320 FCU Disassembly & Reassembly
- Video Index
- Step-by-Step Guide to Disassembling and Reassembling the Sig P320 FCU
- How to Disassemble the P320 FCU
- How to Reassemble the P320 FCU
- Frequently Asked Questions (FAQ) About Sig P320 FCU Disassembly & Reassembly
- Related P320 Content
- Final Thoughts
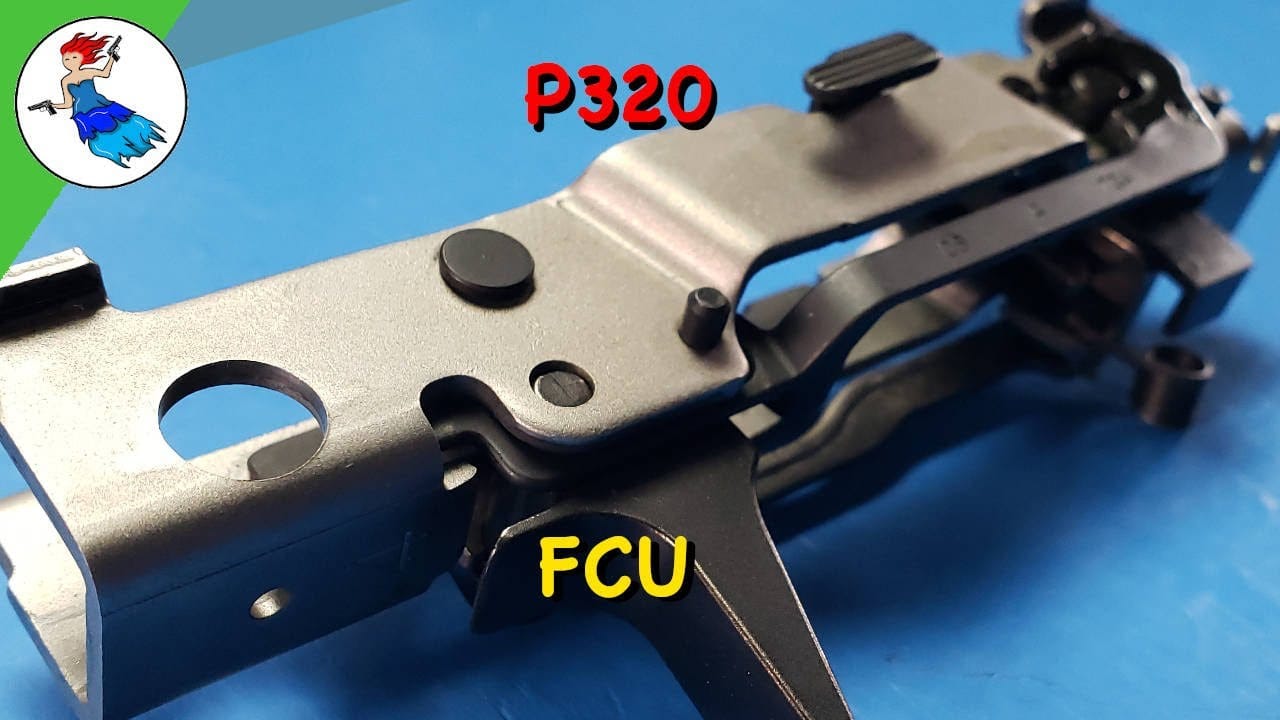
The Sig P320 Fire Control Unit (FCU) is the serialized heart of the pistol. Understanding how to disassemble and reassemble it is essential for deep cleaning, inspection, and understanding how the pistol functions. This guide walks through every step with the precision of a bench-level gunsmith.
TL;DR – Quick Summary for Fast Readers
- Unload the pistol and remove the slide, barrel, and recoil spring
- Remove the trigger and trigger bar from the right side of the frame
- Remove the slide catch lever by pushing the pin from the right side
- Remove the takedown safety lever from the left side (trigger stop pin may be staked on newer models)
- Remove the sear, safety lifter, and safety lifter spring (SIG no longer uses the lifter spring in some assemblies)
- Remove the sear housing using a 3/32″ roll pin punch
- Reassemble in reverse order
Essential Tools Needed for Sig P320 FCU Disassembly & Reassembly
- Punch Set: 5/64″, 3/32″, and 1/8″ punches for pins
- Roll Pin Punches: For the sear housing pin and safety lever housing pin
- Gunsmith Pick: For compressing the takedown safety lever spring during installation
- Grease: For holding sear springs in place during reassembly
- Cleaning Supplies: Solvent, patches, and lubricant for post-disassembly maintenance
Note on Variants: Some P320 sear assemblies no longer use the safety lifter spring. Your pistol may not have this part. Additionally, the trigger stop pin may be staked on newer models or those upgraded through the voluntary upgrade program. If your trigger stop pin is staked, do not attempt removal.
Video Index
Use the timestamps below to navigate directly to specific sections in the video:
- Introduction – 0:00
- How to Remove the P320 Trigger and Trigger Bar – 0:01
- How to Remove the P320 Slide Catch Lever – 1:27
- How to Remove the P320 Takedown Safety Lever – 2:18
- How to Remove the P320 Sear and Safety Lifter – 3:07
- How to Remove the P320 Sear Housing – 4:58
- How to Install the P320 Sear Housing – 6:09
- How to Install the P320 Safety Lifter and Sear – 6:52
- How to Install the P320 Takedown Safety Lever – 8:10
- How to Install the P320 Slide Catch Lever – 9:44
- How to Install the P320 Trigger and Trigger Bar – 10:48
- Final Thoughts – 12:15
- Wrap-Up and Call to Action – 13:07
Step-by-Step Guide to Disassembling and Reassembling the Sig P320 FCU
Before beginning, ensure your P320 is completely unloaded. Remove the magazine, lock the slide to the rear, and verify the chamber is empty. Remove the slide, barrel, and recoil spring. You are now working with the serialized fire control unit.
How to Disassemble the P320 FCU
How to Remove the P320 Trigger and Trigger Bar
The trigger and trigger bar are removed from the right side of the frame. Push the trigger all the way forward—it can only be removed when pushed fully forward. Use a 5/64″ punch to drive out the trigger pin while being careful not to bend the trigger return spring.
The back of the trigger bar is tucked inside the safety housing. You will need to pull it down and away from the housing. Pull the trigger bar straight down and then out. Now slide the trigger bar up so that it rests underneath the slide catch lever. Pull out slightly and twist down, then remove the trigger bar from the trigger spring. Finally, remove the trigger spring from the frame.
How to Remove the P320 Slide Catch Lever
The slide catch can be removed from the frame without removing the trigger, though removing the trigger first provides better access to the pin. Push the pin from the right side of the frame. Remove your punch and pull the slide catch lever from the frame. Finally, pick up the slide catch lever spring assembly.
How to Remove the P320 Takedown Safety Lever
The takedown safety lever is located on the left side of the frame. The trigger stop pin goes through the takedown safety lever and is staked on newer models or those that have been upgraded. If your trigger stop pin is staked, do not remove it. However, if it is not staked, it can be removed by driving the pin out with a punch.
Pull back on the lever to unlock it from the frame and slide it to the other side. Now pull the back of the lever out of the frame.
How to Remove the P320 Sear and Safety Lifter
Our first step is to remove the safety lifter pin as well as the sear pin. Push the safety lever pivot pin from the right side of the frame until it’s completely out of the frame.
Important: There are two types of safety lever pins. The one with the large cap will be removed from the right side of the frame, while the one with the small cap will be removed from the left side of the frame. Now push the sear pivot pin out of the frame from the left hand side. Now push out the sear, safety lever, and safety lever spring.
Note: SIG no longer uses the safety lifter spring in some of their P320 sear assemblies. Don’t be surprised if this part is not in your gun.
Pull up on the two sear springs to remove them from the sear. There are two versions of the sear: one has cups for the springs while the other has pins for the springs. The install procedure for both sears is the same.
How to Remove the P320 Sear Housing
The safety lever housing is held in place by a roll pin in the back of the frame. Using a 3/32″ roll pin punch, drive the safety lever housing pin from the frame. Now rotate the safety lever housing to the rear and remove it from the frame.
Now lift the disconnector from the housing. Important: If you did not have a disconnector, your frame was not upgraded during the voluntary upgrade program.
How to Reassemble the P320 FCU
Reassemble the FCU in reverse order. Gather your takedown safety lever spring, safety lever housing, and disconnector. If you do not have a disconnector, your frame was not upgraded during the voluntary upgrade program.
How to Install the P320 Sear Housing
Install your spring into the left side of the housing. Now insert your disconnector into the right side of the housing. Gather your safety lever housing assembly and safety lever housing pin. We will be installing the safety lever housing assembly into the rear of the frame. Insert the hump of the assembly into the slot in the bottom of the frame. There’s a cutout in the housing to allow it to clear the ejector as you’re installing it. Rotate the housing into place.
Align the housing with the holes in the frame and insert a 5/64″ punch to hold everything together. Now use a 5/64″ hollow ended punch to start the install of the safety lever housing pin, replacing the punch holding the housing to the frame. Use a 5/64″ roll pin punch to finish the install of the pin. The pin is fully installed when it sticks out equally on both the left and right side of the frame.
How to Install the P320 Safety Lifter and Sear
Gather your safety lifter, safety lifter spring, safety lifter pivot pin, and sear. Note: SIG no longer uses a safety lifter spring in some of their P320 sear assemblies. Your pistol may not have this part.
Insert a 1/8″ punch into the larger hole on the right hand side of the frame. Install your lifter spring onto it. The sear spring rides along the right hand side of the housing. Install your safety lifter onto the punch from the top of the frame with the wide leg pointing forward.
Install the safety lifter pivot pin into the left side of the frame, replacing your punch. To install your sear springs onto the sear, you may need a little bit of grease to hold them into place. Install your sear with the springs toward the back of the frame. The hook of the sear will slide over the safety lever pin.
Note on Sear Pins: There are two types of sear pins. The one with the large cap will be installed from the right side of the frame while the one with the small cap will be installed from the left side of the frame. If your sear pin looks like this [small cap], instead of this [large cap], you will install it from the left side of the frame instead of the right.
Insert a 5/64″ punch into the left side of the frame to align the sear with the hole. Now install the sear pivot pin into the right side of the frame replacing the punch.
How to Install the P320 Takedown Safety Lever
The pin in the back of the takedown safety lever will fit into a slot on the left hand side of the frame. We will need to compress the spring in the slot so that we can install the pin into the frame.
Using a pick, compress the spring and start the install of the pin into the slot. Now slide the front of the takedown safety lever into place while pushing the pin farther into the slot.
How to Install the P320 Slide Catch Lever
Gather your slide catch lever spring assembly, slide catch lever, and slide catch lever pin. Place the spring assembly onto the frame with the rubber tip facing up. Now place your slide catch lever into the frame and move the spring assembly so that the rubber tip aligns with the hole. Install the pin from the left side of the frame.
How to Install the P320 Trigger and Trigger Bar
Gather your trigger bar, trigger spring, and trigger. Hook the trigger spring into the hole in the frame from the inside. Now install the trigger bar onto the long leg of the trigger spring and rotate it so that it rests under the slide catch lever.
Now start the install of the trigger into the frame while rotating the trigger bar down. There is a pin on the back of the trigger that will rest in the hole of the trigger bar. Align the pin with the hole in the trigger bar and continue to push in. The final step will be to install the back of the trigger bar. The back of the trigger bar will need to be moved from the back of the safety housing to inside it. Pull out on the back of the trigger bar and move the trigger to the rear. Once the trigger bar clears the back of the housing, push inwards and it should move to the top of the frame and settle into place.
Frequently Asked Questions (FAQ) About Sig P320 FCU Disassembly & Reassembly
How often should I disassemble my Sig P320 FCU for cleaning?
The FCU should be field stripped after every range session and deep cleaned every 500-1,000 rounds. If you carry daily, inspect the FCU monthly for lint, debris, and corrosion.
Can I disassemble the P320 FCU without removing the trigger?
Yes, the slide catch lever can be removed without removing the trigger. However, removing the trigger first provides better access to the slide catch lever pin and is the recommended sequence.
What if my trigger stop pin is staked?
Newer P320 models and those that have been through the voluntary upgrade program have a staked trigger stop pin. Do not attempt to remove a staked pin. The takedown safety lever can still be removed without removing the trigger stop pin.
Why doesn’t my sear assembly have a safety lifter spring?
SIG Sauer no longer uses the safety lifter spring in some P320 sear assemblies. This is a design change and not a defect. Your pistol will function normally without it. Reassemble as shown, skipping the lifter spring step if your assembly does not include one.
What is the voluntary upgrade program and how do I know if my frame was upgraded?
The voluntary upgrade program was SIG Sauer’s response to drop-safety concerns in early P320 models. If your frame has a disconnector installed in the sear housing, it was upgraded. Frames without a disconnector were not upgraded and should be evaluated for upgrade eligibility.
Related P320 Content
- Sig P320 Grip Module Overview — Understand the modular grip system
- Sig P320 Manual Safety FCU — For manual safety models
- Sig P320 80% Build Guide — For aftermarket FCU builds
Final Thoughts
Disassembling and reassembling the Sig P320 FCU is a straightforward process once you understand the sequence and the component interactions. The key is patience—especially when aligning the sear housing and compressing the takedown safety lever spring.
Understanding your FCU’s internal mechanics helps you diagnose function issues, perform deep maintenance, and appreciate why the P320’s modular design is both innovative and occasionally finicky. The voluntary upgrade program changes, variant-specific components, and the sear assembly differences all reflect SIG’s iterative approach to striker-fired design.
If you find our content helpful, consider supporting us by using our affiliate links when purchasing tools and components. Every purchase through our links helps fund more detailed guides like this one.
